Learn to Build a Mobile Phone Network in 22 Minutes

Shôn Ellerton, April 22, 2020
I’m putting my 22 years of telco experience to give you a quick 22-minute tour on how to build a mobile phone wireless network.
Ever dreamed of having your very own mobile phone network but have no idea how to build one?
Maybe you’re just curious and want to know, in very simple terms, how it’s all done.
Look no further! By following my simple guidelines through seven easy steps, you can build your very own mobile phone network and impress all your friends.
In brief, here are the steps we shall cover.
- Expansion Strategy
- Network Planning
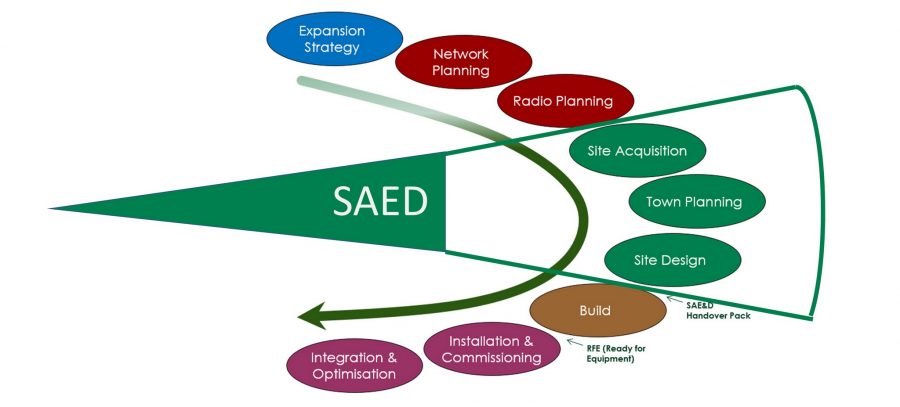
- SAED
- Build
- Installation & Commissioning
- Integration & Optimisation
- Handover Report
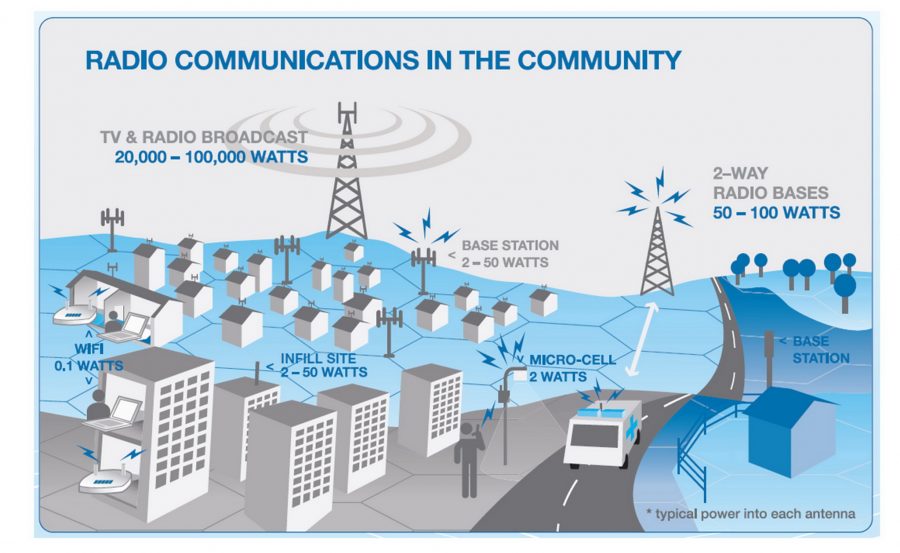
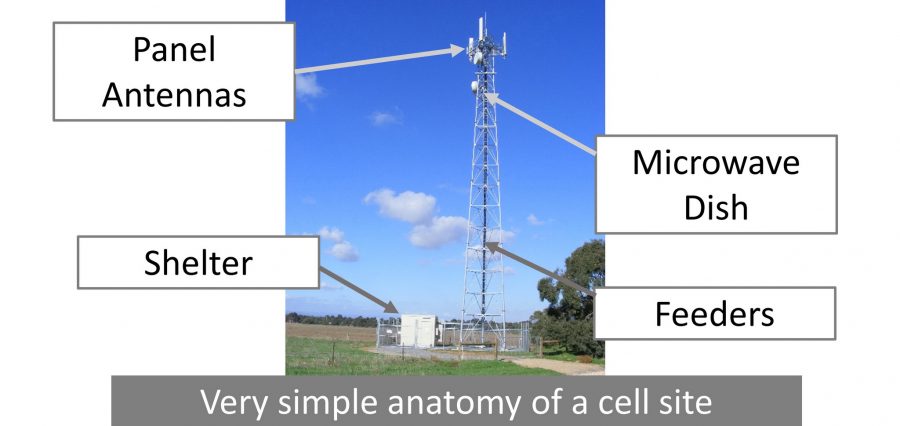
The picture below is a neat little overview of what a typical mobile radio network looks like.
Let’s make a start, shall we?
Step 1. Expansion Strategy
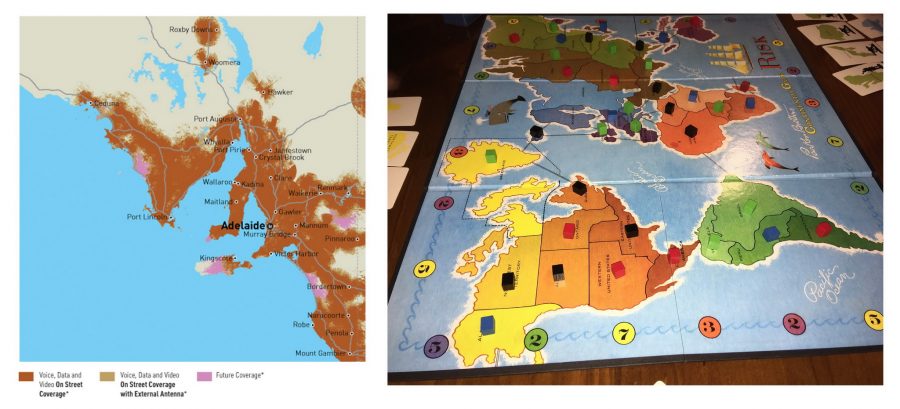
This is the one step which can make you feel like a tyrant vying for world domination. For anyone that has played the board game, Risk, may fully appreciate how much fun this step is.
Unfurled in front of you, is a beautifully colour-coded map to represent capacity and coverage requirements. The idea, of course, is to fill in the missing gaps where capacity and coverage is most required. Being a Risk fan myself, I’ve been toying with the idea to create little miniature base station towers representing the armies and the different team colours representing your local opposition (e.g. Optus, Vodafone, T-Mobile, etc). Conveniently, your local opposition have probably already defined their colours through their branding!
For convenience, it’s good to know that there is an abundance of data on population density in many countries. This will help you enormously on dividing your map of domination into Risk-like regions knowing where to strike. I must be careful with my words, otherwise the nutters in tin-foil hats who claim that 5G creates harmful viruses will come out in force. Where I am, in Australia, SA3 clusters will do very well indeed!
Wouldn’t it be fun pushing little phone-mast armies with one of those long stick-like things on a table-sized map?
Once you’ve set your expansion strategy in place, it’s time to ‘connect the dots’.
Step 2. Network Planning
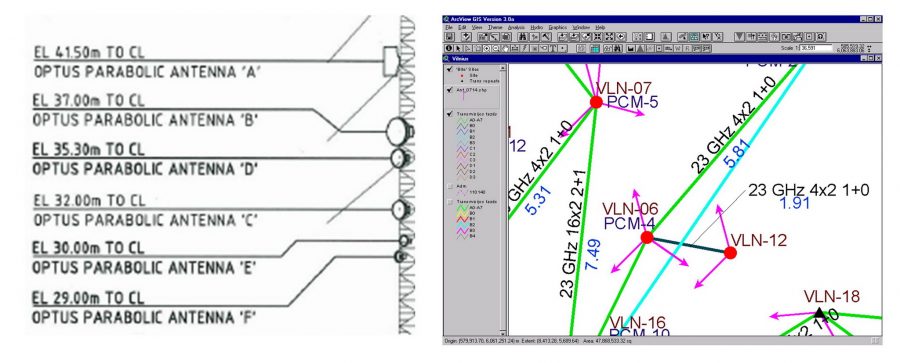
This is the step you can pretend to be in one of those high-tech CSI cybercrime detective-type dramas. The ones where they have that clear acrylic monitor screen where all these fancy intricate lines can be drawn together not unlike a spider’s web captioned with cool abbreviations representing radio frequencies and other technical jargon. Or more simply, it’s like being a child again and playing ‘connect-the-dots’!
In the previous step, you have set up your strategy as to how many towers you need to give you the coverage and capacity to outwit your competitors, or more accurately, get more people interested in using your network.
This step involves being all high-tech and connecting your towers (or nodes if you prefer) together with nice neat lines (let’s call them backhaul or transmission vectors to make it all technical) back to a switch. After all, there’s no point in building a mobile phone tower if you can’t get data to and from it, is there?
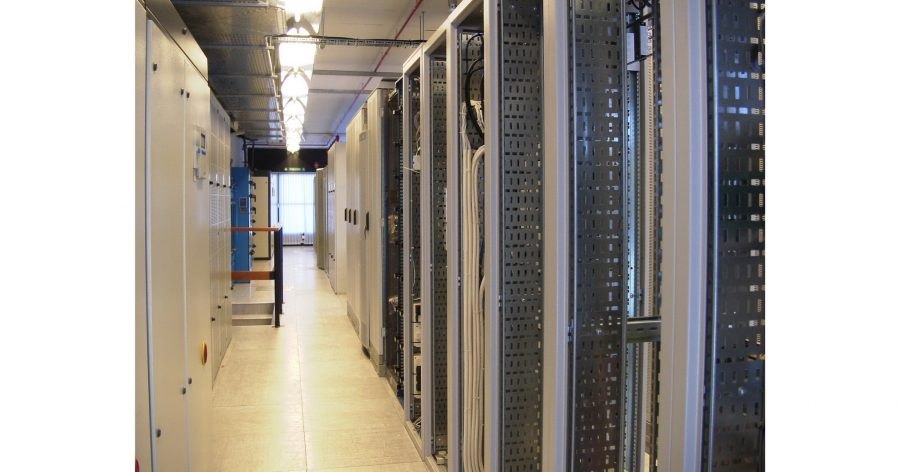
The switch, by the way, is essentially one of those big warehouse type buildings with a lot of equipment in it which has the purpose of sending data to other switches to send the data to another mobile phone tower or simply to your good old-fashioned telephone system, the PSTN.
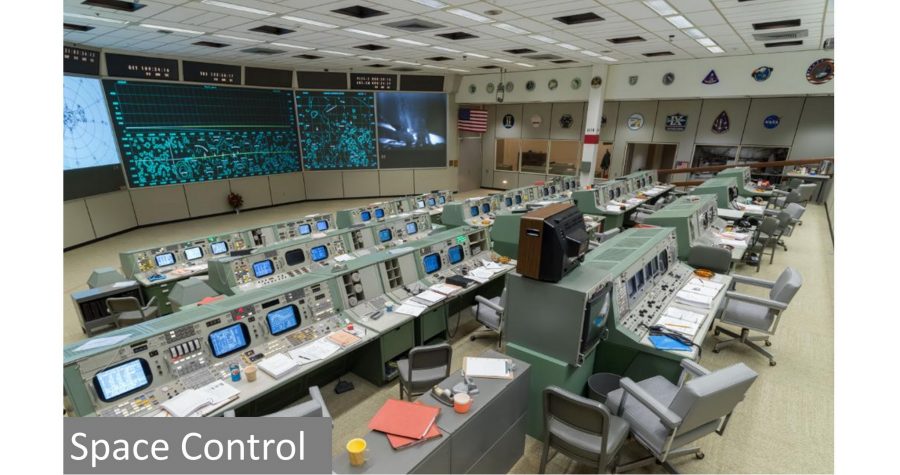
There’s a lot of stuff that happens here but that’s for another story, and that will be cool because it will involve dealing with the NOC (Network Operations Centre), which does its best to emulate what it feels like to be part of a scene in a Hollywood movie depicting NORAD or NASA Control. That’s right. At the NOC, you’ve got all these fancy monitors strewn over a big wall with engineers and supervisors behind computers sitting in terraced rows of seating watching it all intently looking for any trace of trouble. During the quiet times, those in the NOC are most likely watching the footy on one of the monitors somewhere in the lower corner of the ‘big wall’!
Anyway. Back to the neat lines. You can have different colour lines if you like. Why not have one colour to represent radio transmission? You might have noticed that some phone towers have those little round circular dishes, usually situated below the stick-like panel antennas on top. These are microwave dishes which point directly to another dish on another tower. This provides a way to get the data back to another tower on its way to the switch.
You could represent another colour to represent your fibre links. In reality, they are, of course, not straight, but you knew that already. You might have to lay a new fibre run or, perhaps, use an existing stretch of dark fibre, basically a really awesome term for unused fibre which you can lease. Back in the slow days of 2G and before extensive fibre rollouts, we had to be content with using slow and expensive 2Mb leased lines that you can rent out from your telephone provider.
OK. So, you’ve built your spider’s web connecting your mobile phone towers to the network, but they haven’t been positioned yet because we’ve yet to find a suitable place for them.
Step 3. SAED
For me, this is the area which I have had the most experience with. I apologise in advance because this is a long step.
SAED, Site Acquisition, Environment and Design, is a fancy way of saying property, town planning, and design. Exactly what you’d do if you built your own house.
Technically speaking, radio planning is not part of the SAED process; however, because the radio planner is an integral part of the planning and design of the site and often attends scoping visits, I have included radio planning in this section.
I may be biased in saying this, but I consider SAED to be the most complex step of all. It involves the community just for starters! It takes the longest to do. It’s expensive and requires the skills of many disciplines of which most of those are taken up with personnel who’d rather work on more ‘exotic’ projects such as bridges, tall buildings and football stadia only to find themselves doing template-pieces of work driven largely from Excel spreadsheets. From a database guru point of view, designing systems to track SAED (of which I have designed a few) is very challenging.
I will need to subdivide SAED into seven sections:
- Desktop Studies
- the Caravan
- the Radio Planner
- the Property person
- the Town Planner
- the Designer
- Site Selection Report
Desktop Studies
SAED begins when you start looking for site locations or candidates for your proposed tower or installation.
As it’s relatively inexpensive, much of the initial groundwork can be covered by doing as much of your ‘homework’ as you can. This is where the radio planners, designers, property agents and town planners spend a lot of time playing around with Google maps, council zoning maps, making lots of calls to landlords looking for space, checking out population clusters and topographical maps for best coverage, all that sort of stuff. Very important step for predefining candidates and planning for the fun part, the caravan!
The Caravan
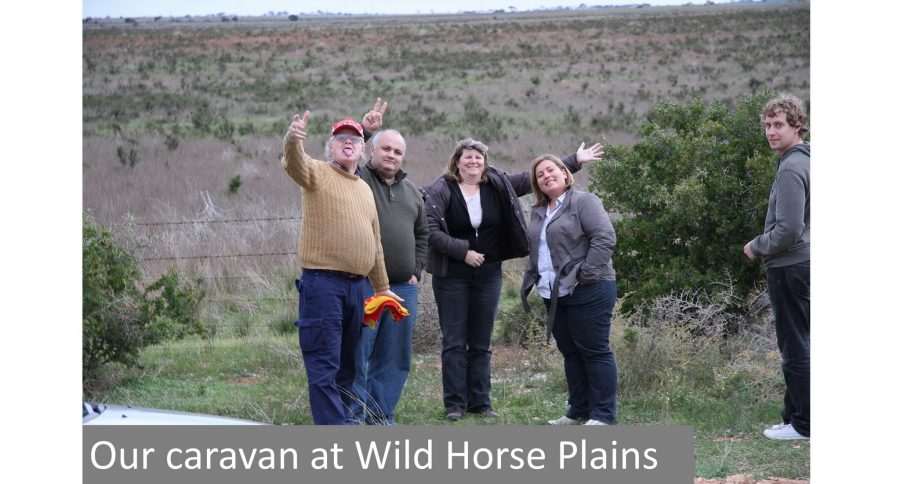
We need to talk about caravans (or scoping visits), because this applies to four very important people travelling together looking for suitable locations to identify candidates for our base station site, or what most of the public just called, the mobile phone tower.
Based on most of the caravans (or site visits) I’ve taken part in, this usually consists of four (or sometimes five) people meeting up at various locations searching for these candidates: the radio planner, the designer, the town planner and the acquisition agent (or, simply, the property guru). On long extended trips, this usually involves being cooped up in a car going from place to place looking for suitable places to build a tower or use an existing structure to put our bits and bobs on.
Trips involving four-wheel driving in remote locations (because, no doubt, four-wheel driving is quite invigorating), hotel stays in tropical resort towns, or just an excuse to be out of the office will, no doubt, attract a fifth person, the client project manager, if he or she is allowed to do so. Trust me, a week’s worth of scoping visits around Darwin during the dry season is actually a lot of fun. To be honest, I would have never experienced so much Australian travel if I never took part in these visits. The occasional shithole for accommodation can turn up from time to time but it’s an adventure all the same.
Depending on how much difficulty there is in identifying a suitable location, there can be many candidates, sometimes along with a great deal of frustration from not finding a good one. Many use the convention of using the alphabet to signify the candidate, for example, Candidate A and Candidate B, being the first two candidates. There was a particularly nasty one I was involved with in Milner (a suburb in Darwin, Australia) for Optus where I thought we would exhaust every letter of the alphabet!
During a caravan, each candidate is visited. The property person knocks on the door and does all the talking. The town planner may make a little ‘side trip’ taking pictures from afar or take note of certain surrounding features. The designer is usually the one scurrying away taking dimensions and taking pictures and the radio planner sits comfortably in the car with his laptop. I’m being jokingly facetious here. The radio planner keeps one step ahead as he has the best knowledge of surrounding installations along with the desired results.
If there is a fifth person, it is usually the project manager working for the client. That person could either be a real help or a real hindrance to the caravan; however, with increased cost-cutting, client project managers and town planners are often omitted from attending caravans.
At the end of the caravan trip, everyone will have collected a dossier of information for all the candidates they visited. All this info will be collated and discussed back in the office with the hope of making a choice which candidate to proceed with, often known as the prime candidate. Should this fail, a backup candidate will be used instead.
What do our four people do?
The Radio Planner
What does a radio planner do?
The closest most people come to radio planning is where to situate their Wi-Fi antennas at home. For those who may have Wi-Fi in apartment units with loads of others also using Wi-Fi may have experienced the problem of interference from everyone else’s. These days, those off-the-shelf units you buy pretty much do all the configuration work for you automatically but some of you might have remembered having to fiddle with the channels making sure you space them out at least three apart.
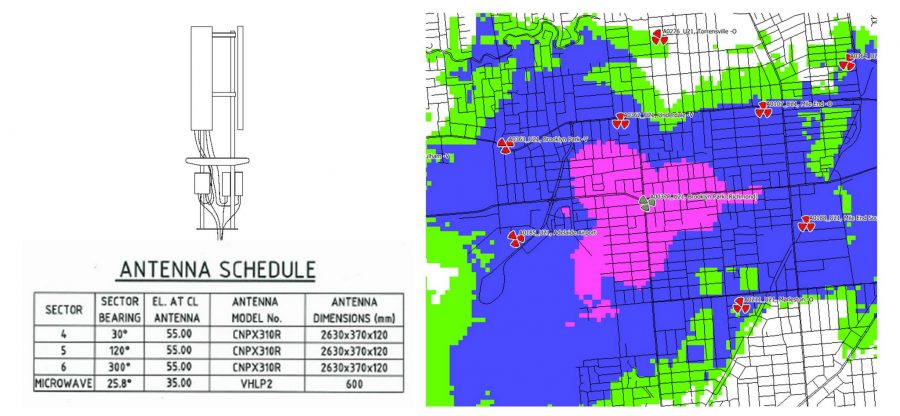
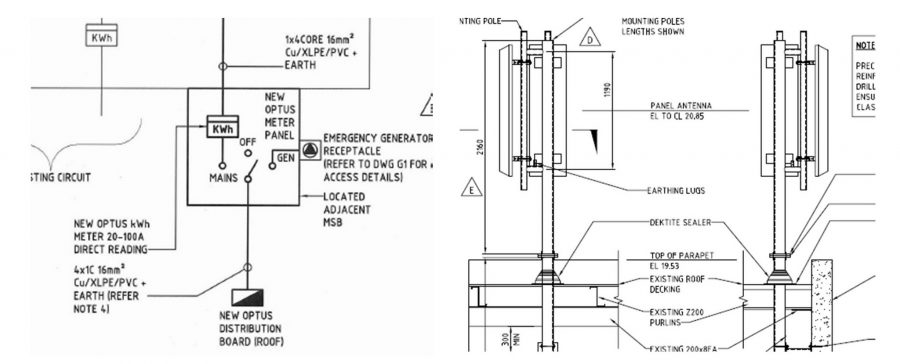
Mobile phone radio planning is quite a bit more complex and we need to ensure that our mobile phone towers are transmitting radio to all our mobile phones in the best way possible. You might look at a really simple tower configuration with three of those vertical rectangle antennas. Each one is called a panel antenna and they blast out the signal required to reach your mobile phone. Each one is designed to radiate outward in a wide arc to get the most coverage but they can be altered to be made narrower or wider. They can be tilted both electronically and mechanically as well to point down to where the signal is needed. Each panel antenna emits a signal to cover a sector, what is known as a cell, although the more advanced antennas can do a heck of a lot more being able to transmit multiple cells across a range of different technologies. They have got significantly more advanced than they were when I first started out in telcos.
Now let me tell you a little something about radio planners.
The radio planner, often the quietest one in the car, as he’s always got his laptop open, will scan the ground for the best place to put a site. Sod’s Law will suggest that this will be in the most difficult place possible for the rest of the crew in the car! The prominent brow of a hill with no power available. On top of a heritage-listed building. On top of water tanks. I guarantee that it won’t be a lovely bit of flat ground with power nearby.
In my experience, the radio planner can be, and I’m sorry to be crude here, a pain in the arse. He or she doesn’t want to be, but it’s in their nature to get the best possible coverage. Having been a designer, I’ve had radio planners ask me,
‘Hey, what about making a grid thingy to put our panel antennas on and putting it right over that electrical substation? You engineers can do that, can’t you?’
I remember this occasion very well whilst working on the BT Cellnet project many years ago in London. The remaining three of us shrivelled up as we stood in front of this electricity substation, humming ominously with rather dangerous-looking columns of insulator plates separating us from death by electrocution while the radio planner looked on with hopeful eyes.
Radio planners are difficult to satisfy, and frankly, don’t get out enough! They want the best possible coverage, and if it means having to resort to sticking tens of dozens of panel antennas on a very large tower, so be it. Ugliness is not in the vocabulary of a radio engineer. Thankfully, we have checks and balances in terms of what the community will accept and government legislation to prevent the proliferation of mobile phone towers that look like a dog’s breakfast or those that exceed power output guidelines through such bodies like ICNIRP (International Commission on Non-Ionizing Radiation Protection). That’s just a great acronym, isn’t it? We have our town planners to help us out on many of these issues.
On caravan visits, we usually prefer our radio planners to be out of earshot from potential landlords as they’re likely to scare them away with words like radiation, absorption, Fresnel curves, saturation, etc! Another joke. Sorry.
The Property Person (or Acquisition Agent)
What does an acquisition agent or property person do?
The property person is basically the realtor who hunts around looking for interested landlords who’d be happy to give you a little space for your tower in return for a healthy rent for the next twenty or so years. It’s a bit like getting your commercial estate agent to find you a suitable warehouse for your new business.
Being a property person means making endless ‘cold calls’, evading rabid dogs, placating dangerously unbalanced landlords, being able to say the right things (for example, rather than say radiation, say transmission), and negotiating a package that will make a potential landlord and the client happy. And this is all happening while the rest of the caravan crew are safely sat in the air-conditioned car.
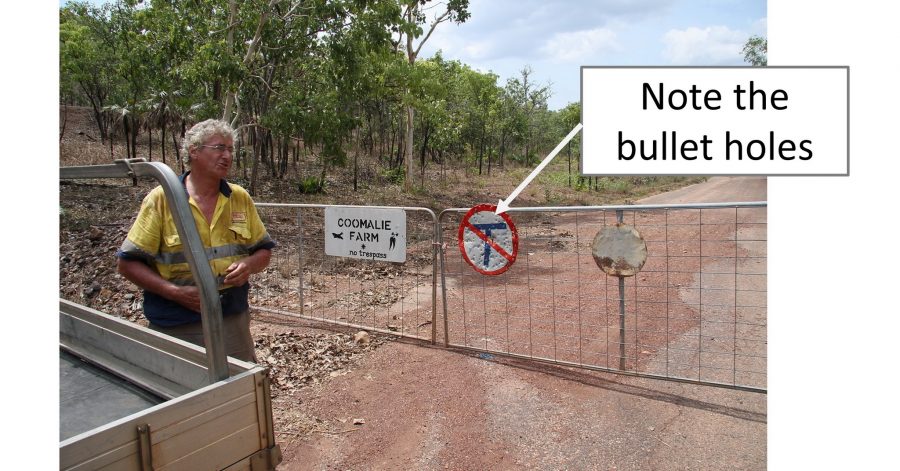
On one occasion, we met up with a landlord around the Lake Bennett area near Darwin who detested Telstra so much that every time Telstra came to do a bit of maintenance on their tower which is on his land, they came unannounced by helicopter. Judging by the photo below, the hatred is all too evident!
Only when the potential landlord looks friendly enough, much like when a stranger introduces their ferocious dog to you, the property person ushers everyone out to do their bit while keeping the radio person well away if he decides to get out of the car at all. Sorry. I couldn’t resist!
The property person tends to be the frontline soldier of the caravan armed with the power to suppress a confrontation or two.
I, once, had a scare when I did a survey on top of a block of flats in East London, when this incredibly vicious woman came storming out at me from the roof stairwell door shouting to me that I was responsible for three-headed people and that I had better leave right now. I backed down, quietly put my tools away, aborted the mission and updated the Site Hazard form to be mindful of demon-possessed ladies on top of rooftops.
The Town Planner
What does a town planner do?
If there’s anyone who knows a lot about the laws and codes of the land, it is the town planner. For those into real estate, this is the bit that defines what you can or cannot do with respect to building on a certain piece of land. All land is divided into zones of different classifications, for example, residential, commercial, industrial, recreation and so on, all downloadable from government websites in the guise of attractive colour-coded maps. Moreover, there are a whole host of other potential factors that the town planner must consider depending on which council or local authority is involved.
The town planner needs to have a good eye as well. He is the antithesis of the radio planner. Beauty is everything. Simplicity is awesome. The town planner knows all too well that an innocuous-looking slimline monopole with three panel antennas is going to have a little more chance of being accepted into the community than the radio planner’s dream of an angry-looking Eiffel Tower laden with dozens of panel antennas.
The town planner may have a little drive away from those scurrying around on site during the site visit to snap a few pictures from afar whilst taking in the fresh air. These pictures may be used to make cool-looking before-and-after photos with a ‘nice-looking’ tower to show to the council. These are known as photomontages. Although restrictions are becoming more commonplace on drone use, town planners find these to be a real aid in taking these sort of photos.
Unfortunately, for the town planner, life is often not easy. Like the property person, the town planner may have to deal with the whole of the community, some of which, may be up in arms in disgust of having a tower overlooking their backyards. Hence the term, NIMBY, meaning ‘not in my backyard’!
The town planner has the unenviable task to submit countless council forms and may have to attend Development Application Panel (DAP), Development Assessment Commission (DAC), or even Indigenous Groups meetings.
The town planner must ensure that the initial planning drawings submitted by the designer is absolutely correct, otherwise the whole palava of re-starting the whole process could happen. For example, showing the antenna to be a fraction of a metre higher than what it’s supposed to be could make an overzealous council planner jump up with glee insisting for a re-submission with additional fees!
Again, from experience, the town planner is often the quietest and most reserved in the caravan; however, town planners, at least those with an interest in telcos, often do rather well climbing up the ladders of telco management. Probably because of their knowledge of all the codes in detail.
The Designer
I was a designer for the best part of ten to fifteen years, or more precisely, a structural designer. They are the ‘jack of all trades’ in telco because they, broadly, have to understand a little bit of everything in telcos. However, designers are often quite content walking around with a tape measure in hand, doing some sketches, and then mucking around on AutoCAD taking pride and satisfaction in their drawings.
I can only speak from experience here, but in every caravan, at least the ones I hosted, it is the designer who acts as the coordinator. The designer arranges the trips, collates all the information, liaises with the client and ultimately prepares the final site selection report.
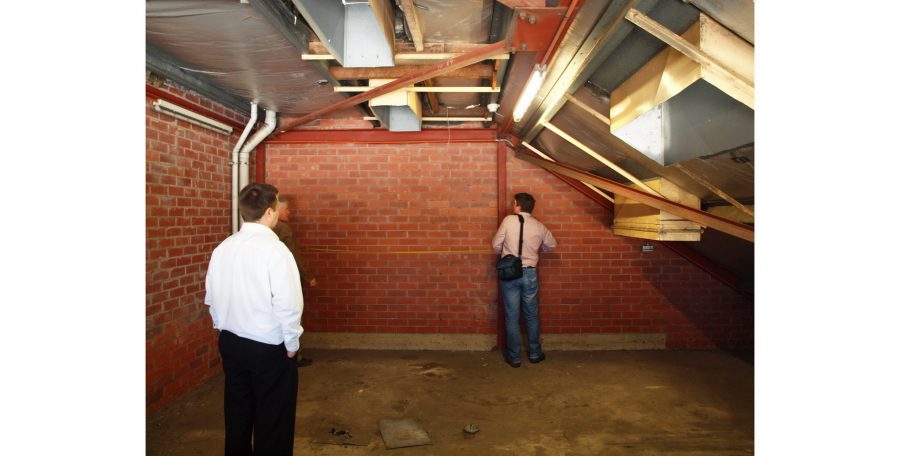
The designer never has enough hands. Taking photographs, measuring up (tape measures, reel tapes, laser measures), writing notes, taking coordinates, and so on whilst listening to everybody in the group discuss where they want the site to be located. Everybody looks a little sorry for you running around with a tape measure so, it is of no surprise that one of them may show a little sympathy by offering to hold the tape for you while you’re measuring!
The designer, usually trained as a structural or civil engineer, will be the one everyone will ask if it’s possible to build a site in the most impossible of places. The designer, much like the town planner, seeks simplicity. Measuring up for a standard tower on a solid, flat piece of ground with convenient access to three-phase power is nirvana. Designing a custom installation in which you need to install panel antennas on a live radio tower, or worse, a high-voltage electricity pylon with no space at all to build a standard shelter (an air-conditioned portacabin-type structure to put all your gear) next to it is hell.
The designer needs to possess a very good knowledge of structural and rigging design, a reasonable knowledge of electrical design, and a lot of common sense. Rigging is all the stuff that goes on the tower or existing structure: feeder cables, fibre cables, waveguides, panel antennas, amplifiers, remote-electronic tilt boxes (RET), microwave dishes, and all the ‘plumbing’ that goes into the shelter to connect to the equipment in the shelter housing all the BTS (Base Transceiver Station) kit and other electronics.
Moreover, the designer needs to have a sound knowledge as to what bits and pieces need to be catered for in the shelter. Such items include air conditioning, power supplies, rack space, radio kit, switches, routers, digitisers, D/C converters, and many other components. It’s good and well if you can get a standard shelter pre-ordered with all the stuff in it, but many designers dread designing for in-situ spaces or rooms where all this stuff needs to be custom-defined.
Electrical design is usually carried out by electrical engineers back at the office or commissioned out to the power authority. The designer on site need only take the basic details back for the electrical designer.
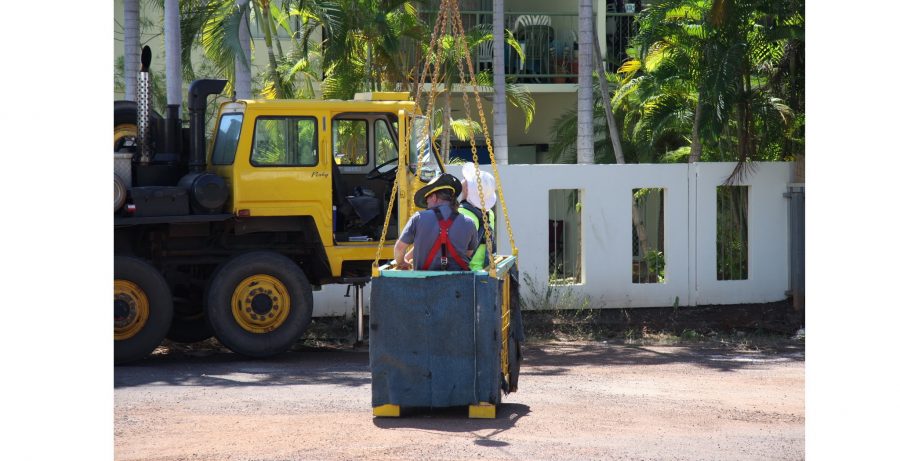
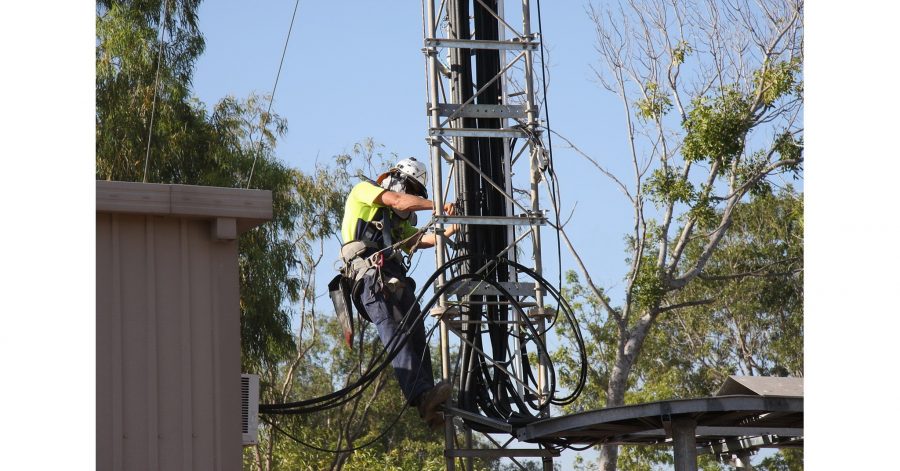
For remote and rural sites, microwave dishes to connect from tower to tower are often used whereby the designer coordinates a special crew of people to take measurements to ensure that proposed microwave dishes can be installed correctly to transmit to each other without obstruction. This is called the line of sight (LOS) exercise. Traditionally, this involves having lots of fun with cherry-pickers and cranes with specialists taking high-definition photos from one tower to another. The use of LIDAR and drones has made this task much easier, especially in situations where getting access to a large cherry-picker or crane is nigh-on impossible in remote or difficult-to-access locations. Sometimes, one needs to be creative when a cherry-picker isn’t available as can be seen in the below photo. Being dangled from a crane didn’t really work as it’s mighty difficult taking precision photographs in a moving box in the wind.
Like the town planner, whose job is to ensure that the planning drawings are spot on, the designer must ensure there’s enough information to take away after the caravan, especially for remote sites. It is extremely embarrassing to be asked to design for a candidate in which you don’t have that critical measurement!
Bonus! The Design Visit
Aha! I snuck this one in. The design visit. Gone are the days where each tranche of new sites was given two rounds of visits by default; one being the caravan or scoping visit and the other, the design visit. It’s just too expensive, especially for rural Australia! However, there may be the odd occasion or two that it is necessary to send a designer to take some detailed measurements in order for the site to be designed. This usually occurs when scoping visits are rushed and the designer hasn’t the time to document everything needed to design every candidate visited.
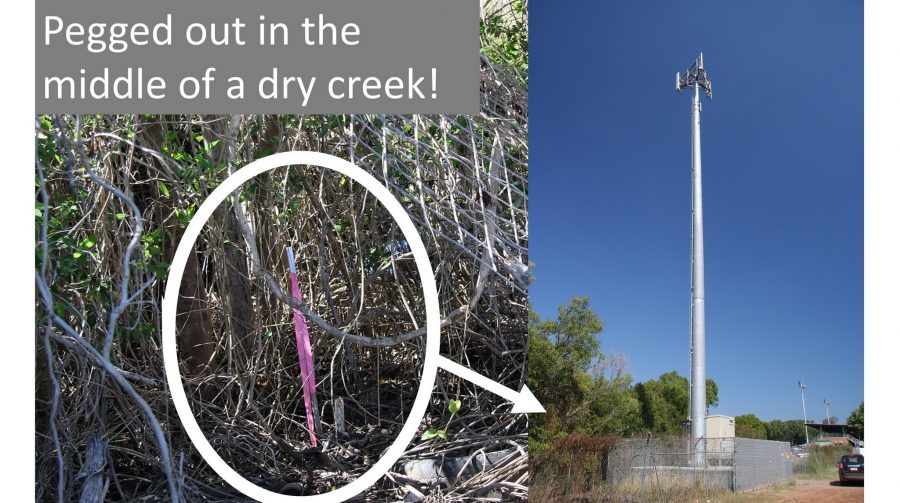
Those who take the path of designing a site by taking shortcuts without taking proper measurements do so at their peril. I remember checking up on a proposed Optus site just about to be built on a rugby ground in Ludmilla, Darwin. The survey guys pegged out the site as to the coordinates in the drawing. Unbelievably, the guys pegged out the site in the bottom of a dry creek bed; at least 30 metres away from the proposed location. You would think that those who pegged out the site just might have questioned this, but no. After all, we are talking about the Northern Territory!
Moral of the story. Don’t design based on Google Maps, and, for heaven’s sake, use the right geodetic datum (e.g. WGS84, OSGB36, GDA94, etc)!
Design visits that entail flying someone up to exotic and remote destinations can be nothing short of being a little bit of a mini-holiday with a little work thrown in. Designers love them as they are not being pressured by the rest of the caravan to get the job done and plenty of time to do it in. The best experience I had was when I was asked to measure up some stuff in a Telstra exchange in Jabiru, which is right in the heart of Kakadu National Park. I was given the keys to a car, had all day to drive to Jabiru. Do a half-hour’s bit of measuring up inside the exchange, amble over to the luxurious crocodile-shaped hotel (the only hotel there), have a nice dinner and a sleep. The next day, I had to drive to Katherine to do something similar at a Telstra site in Tindall Base. Because the drive was several hours long, I had time to have a swim in Upper Edith Falls on the way. Tourists pay huge sums of money to vacation at the Top End, and I was getting it for free!
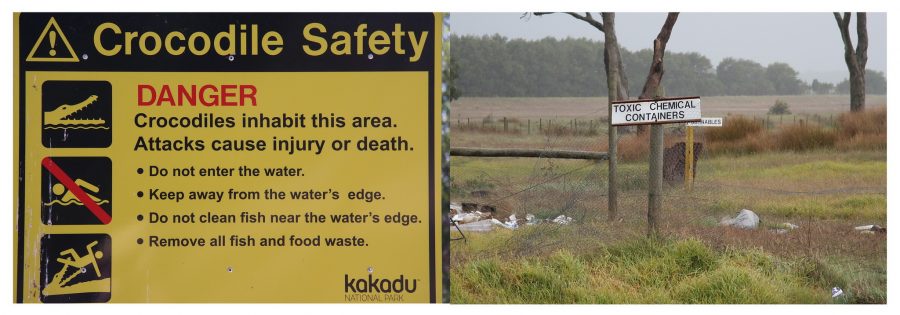
It’s not without its downsides though if working outside. Working in high heat and high humidity can be frustrating. Your camera steams up. You sweat like a pig. You make as much noise as possible while traipsing through the grasses hoping the snakes will run away. And for those times I worked in the UK in winter on top of towers and, oddly enough, fire station drill towers, the howling, cold wind that bites into your hand and face making it impossible to write anything down. One, of course, needs to be wary of places you shouldn’t be near to, for example, crocodile-infested rivers and toxic waste dumps!
Working indoors, one must be a little careful what they touch in a switch site or an exchange. I recall a near-miss of a major embarrassing incident whilst working at a very large switch T-Mobile switch site in Radlett in the UK. Upon exiting one of the main rooms lined with BTSs, BSCs, MSCs, all the really big monstrous machines that keep a mobile network going, I nearly pressed the Emergency Stop button instead of the ‘Open Door’ button. Such an incident would have blacked out a quarter of the T-Mobile network in the London area at the time. It certainly would have blackened any chance of getting a promotion!
The Site Selection Report
After having all the fun during those caravan and site design visits, it’s time to get serious and put it all into a report. The designer or the project manager will prepare a detailed site selection report, or candidate ranking report, or whatever you want to call it, and then submit it to the client for review.
I’ve spent many a weekend trying to catch up with putting these things together. I guess it’s the penance for all the great time being away on those adventurous caravans! It’s highly repetitive and involves collating drawings, entering mind-numbingly-dull data into client’s databases, drafting health and safety plans, merging all the reports together created by the town planner and the property guys, and collecting other important artefacts to form the final recommendation, because, frankly, this is what is first going to be read by the client. Possibly the only thing to be read!
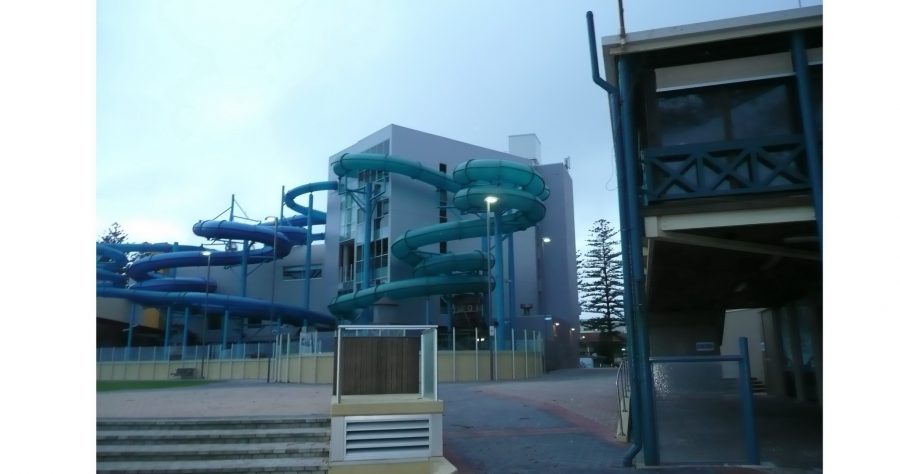
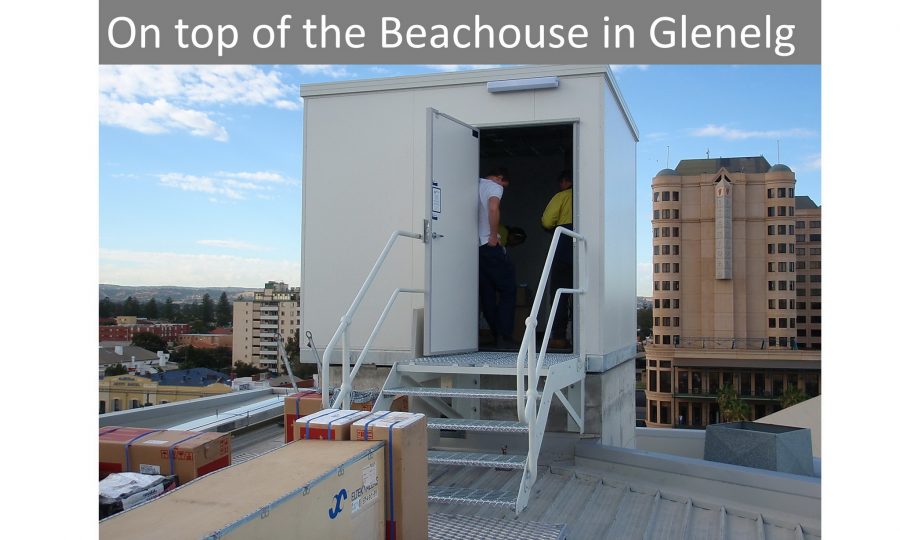
Some client project managers are bewilderingly quick to criticise or nit-pick at the least important item in a design pack. On one occasion, whilst working on a concealed site (or a stealth site) on top of a leisure facility in Glenelg, South Australia, the client commented on the type of lock I was using but failed to take note of the paint colour I specified on the drawing of the surrounding rooftop shelter to blend in with the council’s requirements. The client project manager ordered the wrong paint. Many of us cheered when he reached retirement, but I still had a lot of respect for him as an engineer.
Once all the reports have been submitted to the client, with any success, the designer’s recommendation will be honoured and the site will proceed to the build phase!
And here ends the very lengthy and complex SAED part of our guide!
Step 4. Build
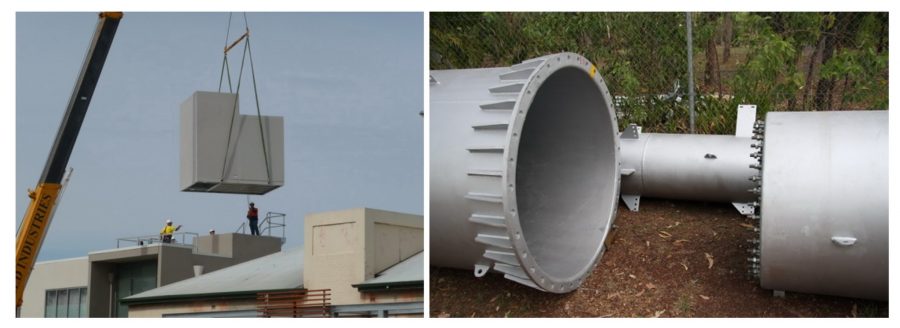
The build part, is arguably, the most exciting part of the whole process. All the construction vehicles come roaring through with bits of tower to assemble. Cranes, bulldozers, excavators, steelwork being delivered, drums of fibre and coaxial cable being rolled out. And this is the thing. It often takes very little time to put it all together. Sometimes in a couple of days! It can take weeks and weeks, even months to get something sorted out in the previous SAED step with nothing to show for it in terms of anything been done on site.
From a process point of view, build is largely straightforward, and, if I put my database systems hat on, the easiest part of the system to design for.
A few things happen before any construction vehicle arrives on site and build commences. For starters, once the prime candidate, from the previous step, is given the go-ahead, the designer or project manager must oversee the detailed design of the site, get all the planning approvals and permits done, and the executed leases with the landlords and put them into a nice little bundle called the build pack, a thick tome of documentation needed to physically build the site.
Build engineers are then sent out to the proposed site to measure out again and to check that the detailed design will actually work. I did some of this while on an Optus project in Sydney, and, let me tell, many of those detailed designs did not work. Certainly not without a lot of modification. This is a common problem when SAED work is done and then passed over to a different outfit to do the build.
Designers who pass their work over to build usually anticipate the occasional call coming in from the build contractor, much like a trader doing a short in the market dreads being give the margin call.
Expected questions may include the following:
‘Hey, these connections are not strong enough for these beams.’
‘We can’t do hot work here. Can’t you design using nuts and bolts?’
‘Where’s the plinth waterproofing detail?’
And the king of them all. ‘There’s no underlying support there, guv! What shall we do?’
Doing the late 90s, I worked as a designer/project manager on the BT Cellnet 2G rollout around the London area. The role was markedly different than what is normally in telcos today. The designer not only completed the SAED portion, but also managed the build contractors, conducted prestart meetings, attended supervisory duties doing build, attending practical completion visits and providing the handover packs. It was good experience and provided the designer with great satisfaction to really see the site being built there and then. On many occasions, I would ruck up in the early hours or in the middle of the night on site, and, all being well, would not have any questions asked of me by the foreman while enjoying a cup of tea watching my design being transformed into reality. On attending the practical completion visit, you can see the fruits of your success or of your f*#k ups if you didn’t design properly!
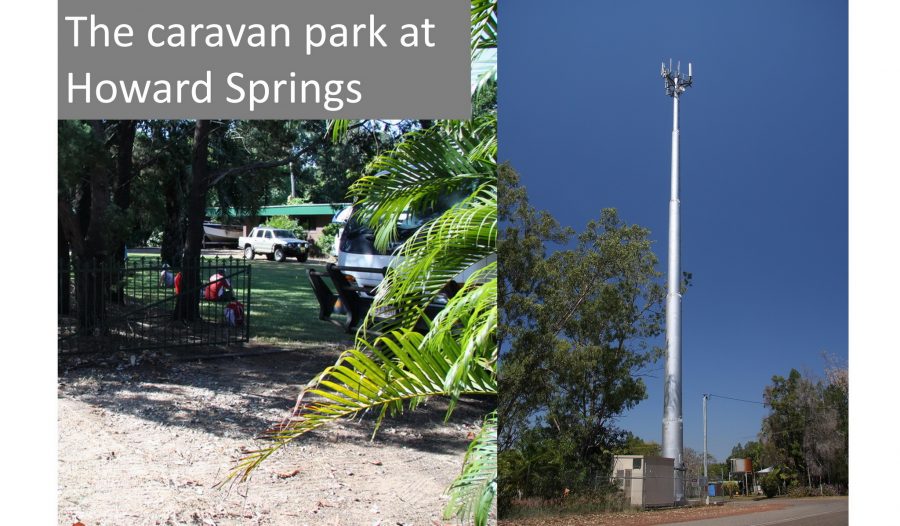
Some companies try to save money and take shortcuts by building without appropriate project manager supervision. One such example I remember is for a rather large monopole site I designed to be located within a caravan park in Howard Springs, Northern Territory. It was owned by a particularly fussy landlord who hated mess and did not want anything out of place. And quite rightly so. Anyway, the builders decided to deviate from the drawings and to trench right through middle of the park instead of following the boundary. Needless to say, the owner of the caravan park was hopping mad and furious. The Perth-based builder thought they could get away with not sending their project manager to save a few dollars on travel. Turned out, they had to pay significantly more to tidy up the mistake.
Step 5. Installation & Commissioning
Now that we’ve got a new site that has just been built, you’d be disappointed to know that it’s not yet ready to be used. The antennas, feeder cables, microwave dishes (if needed) and the shelter might all be there, but there’s no equipment inside the shelter. All the wizardry happens inside the shelter. Pallets carrying BTS kit with transceiver modules, boxes containing fibre switches, power supplies, routers, serialisers, RET controllers, and many other bits of incredibly expensive electronics have to be installed and connected together by experienced field technicians who have brains that can absorb entire technical manuals and, yet, able to impress you by showing you their latest RF burn they got while handling the end of a live coaxial feeder cable.
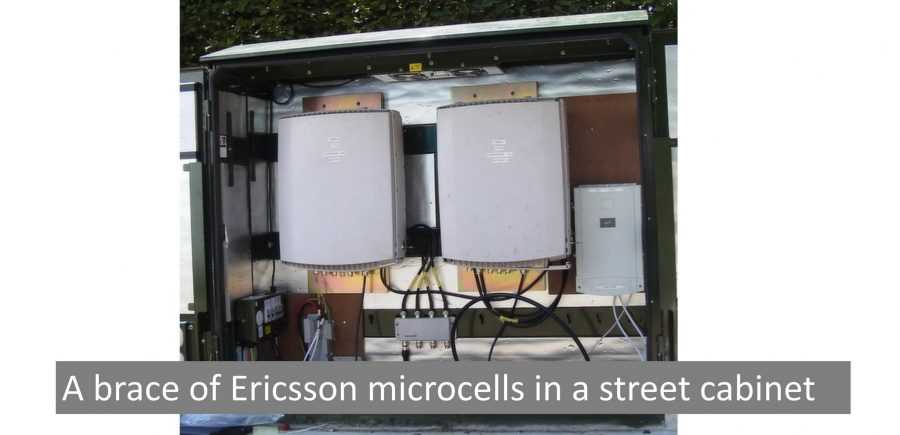
The I&C (Installation & Commissioning) field technician is possibly one of the most knowledgeable people you can across in telcos. They are also some of the nerdiest having access to an entire vocabulary of telco-specific acronyms that most telco personnel are not even aware of. The only nerdier ones are those who work in the RAN (radio access networks) department, and having worked with them back in the early 2000s on microcells, I am proud to say that I have fully assembled an Ericsson RBS2302 (a 2G microcell BTS) from scratch. When 3G and 4G came along, yet more acronyms came into existence leading me to believe that, what 5G really means, is that we now have 5 times more acronyms than we had during the days of the old analogue mobile networks!
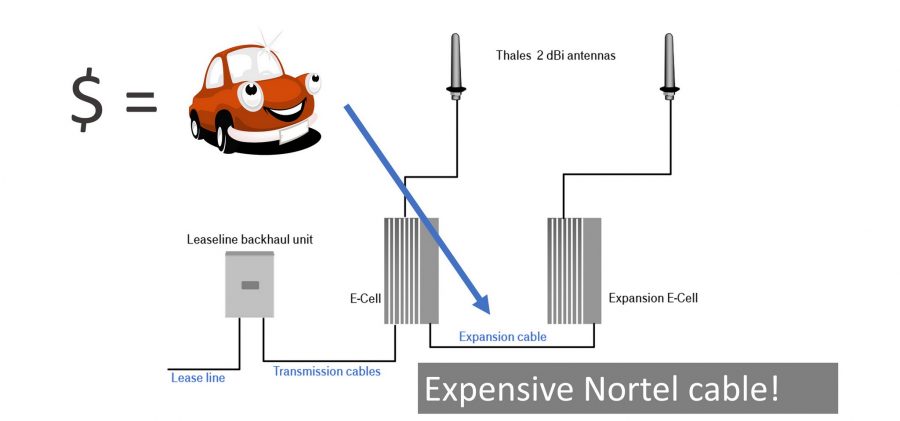
After installing all this kit, it needs to be connected to the network, either through the fibre backbone or transmission via the microwave dish. Ethernet cables, coaxial feeders, single-mode fibre cables, elliptical waveguides, and not to mention all the proprietary custom cables which the manufacturers of the kit force you to use turn, what was once a nice neat layout inside the shelter, into a veritable rat’s nest of wires which the field technician attempts to neatly put into place. Speaking of custom cables, I remember having to connect multiple Nortel E-Cells (another 2G microcell BTS) together using their special expansion cable. That cable costed as much as a new car. Small wonder Nortel went out of business!
Once we test that our site is connected to the network, it’s time to do a little polishing.
Step 6. Integration & Optimisation
I nearly landed up doing my career in this area back in 2001 but ended up going down the SAED route instead.
In a nutshell, integrating your site means identifying your newly connected site and making it a part of your network. In simple terms, it’s kind of like connecting a new computer in the office and making it a part of your domain.
Once integrated, it is now part of your network and should be working properly being able to take in mobile traffic from its vicinity. However, don’t forget to integrate the site, because I recollect one story of a site that was newly commissioned by T-Mobile in the UK and, somehow or another, was never integrated. It seemed to be forgotten for some time only for someone to flag the issue of,
‘Hey, guess what guys, there’s a new site in that valley over yonder that we’ve never switched on!’.
But is your new site really working properly? How is it coping with all the other adjacent cell sites around it? Can I walk with my phone across to another cell site (handing over) and still maintain a conversation?
If you haven’t done your optimisation, then it’s unlikely you’ll get a smooth-running network. This is where the boffins gaze at computers with big screens filled with lots of colourful maps criss-crossed with lots of lines and littered with geometric shapes tweaking the network to ensure that the network is working at its most efficient capacity with seamless handover between cells.
After optimising the network, the whole cycle begins again as to what additional capacity and coverage is required prompting us to revisit Step 1 again.
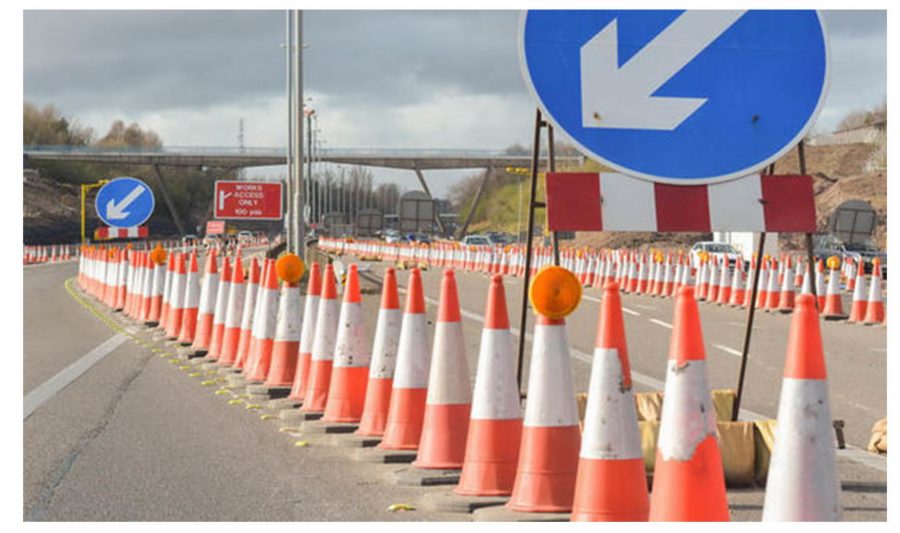
I remember when existing 2G optimisation took a back seat during the initial 3G strategy and ensuing rollouts in the UK whilst working at T-Mobile during the early 2000s. I frequently made journeys from London to Bristol on one of the world’s busiest motorways, the M4. Apart from the thousands of road cones which perpetually line the motorway (at no time will you experience a road cone-free road), I get cut off in four distinct places on the motorway every time. Not for lack of coverage, but because of handover issues.
I don’t know much of the detail of how optimisation works, but it’s certainly important.
Step 7. Handover Packs
This, I’m afraid, is the soul-destroying step of building a network and not at all interesting or satisfying.
The handover pack is a very thick wad (now electronic of course) of documentation which goes back to the client. It includes anything and everything about the site you’ve just built.
It is so utterly boring, repetitive and unengaging that I’ve witnessed grown men turn to zombies, many of them ending up falling asleep on their keyboards for lack of stimulation.
As if it’s easy to provide most clients with your electronic bundle of handover documentation? Think again.
Some clients will, seemingly, make it as difficult as possible for you to upload your handover documentation. I’ve known colleagues who took a whole day to upload one handover pack on a recent Optus project. Whether it was because they weren’t good at it or simply they already turned into a zombie is open for comment.
Unfortunately, handover packs are a fact of life, and despite being immersed in a vast lake of telco data, perhaps never to be read again, the site isn’t complete without it.
The End
That’s all folks for this session!
I had a bit of fun writing this having been a ‘prisoner of telco’ from 1997 to 2018 and being engaged in so many aspects of building a mobile wireless network.
Thanks for reading and hope you also enjoyed some of my photos from down memory lane!
